sish: Ngrok self-hosted alternative
Introduction of sish project as a self-hosted alternative to ngrok for secure tunneling with TLS support for HTTPS, WSS, and TCP using custom domain.
I am not affiliated with the
sishproject in any way. I just find it to be a great solution for secure tunneling and wanted to share it with you. I have been usingsishfor a while now, and I am very happy with it. It is a great alternative tongrok, offering full control over your data and traffic.
sish Introduction
sish is an open-source project created by Antonio Mika, that allows you to create secure tunnels to your local services, similar to ngrok. There is no need to install additional client software on developer machines, as it uses the standard SSH protocol to create tunnels
If you want to expose their local services to the internet, they usually use ngrok, since it is the first result on search engines. However, ngrok is a proprietary solution. You have to trust a third party with your data and traffic. Additionally, the free tier has limitations that may not suit all use cases.
The most problematic aspect of ngrok is that all traffic is routed through their servers, with TLS termination handled on their infrastructure, which poses the risk of unencrypted traffic between ngrok servers and your local services. This can be a significant security concern, especially if you are handling sensitive data.
There are various self-hosted alternatives, but many require installing additional client software on developer machines, which can be a barrier to adoption, or are not easily self-hosted. sish stands out as it uses the standard SSH protocol, which is already available on most systems, making it easy to use without additional software.
If you accept the risk of exposing your server to the internet and can tolerate time-to-time downtime (due to maintenance), you can have a fully functional tunneling solution at minimal cost and maximum control over the data. Usually, you can use the cheapest VM on any cloud provider to host sish.
For a more detailed introduction, check the official documentation: https://docs.ssi.sh/how-it-works
Usage of sish
I will demonstrate here the basic usage of sish to create a tunnel to a local service, so you can see how it works in practice and if it fits your use case. More advanced features and use cases can be found in the official cheatsheet: https://docs.ssi.sh/cheatsheet
This usage demonstration will already use the server that was created as part of the tutorial.
To create a tunnel, you run the following SSH command:
| |
Output of this command will look like this:
| |
Head to the provided URL in your browser, and you should see the service running on your local machine, but accessible through the sish tunnel and secured with a certificate.

The subdomain does not need to be provided. If you do not specify it, sish will generate a random one for you:
| |
To simplify the usage to have ngrok-like experience, you can create a custom alias in your zsh/bash rc file:
| |
This simple function will make the tunnel creation as simple as this:
| |
To keep your muscle memory in place, you can name the function ngrok instead of sish, so you can use the same command as before, but it will use your self-hosted sish server instead of ngrok.
Setup
I will use the cheapest VM on Azure with manual wildcard certificate from Let’s Encrypt for this demo. You can use any cloud provider or your own hardware to host
sishwith automatic certificate renewal (using https://github.com/adferrand/dnsrobocert, for example).
Whenever you see
dt.smtl.cz, replace it with your own domain.
Step 1: Prepare the VM
The Internet is already full of tutorials on how to create a new VM and install Docker on it, so I do not see the point of going into detail. Follow your best practices or an internet tutorial to create a new Ubuntu VM with Docker and Docker Compose installed.
When you have Ubuntu and Docker ready, allow the following ports in the VM firewall:
22- Usual SSH port for server management- Should be limited to your management IPs only
2222-sishSSH port for tunnel creation- Should be limited to your developers/VPN IPs only
80- HTTP port for HTTP traffic forwarding- Should be publicly available
443- HTTPS port for HTTPS traffic forwarding- Should be publicly available
Step 2: Domain configuration
The DNS configuration process will vary depending on your DNS provider. You need to create two DNS records:
- Record of type
A- Name:
dt.smtl.cz - Value:
<Public_IP_Of_VM>
- Name:
- Record of type
CNAME- Name:
*.dt.smtl.cz - Value:
dt.smtl.cz
- Name:
 DNS records configuration
Step 3: Request a wildcard certificate
I use WEDOS for my DNS configuration, so I will use DNS-01 challenge to request the certificate. Consult your DNS provider documentation on DNS-01 support.
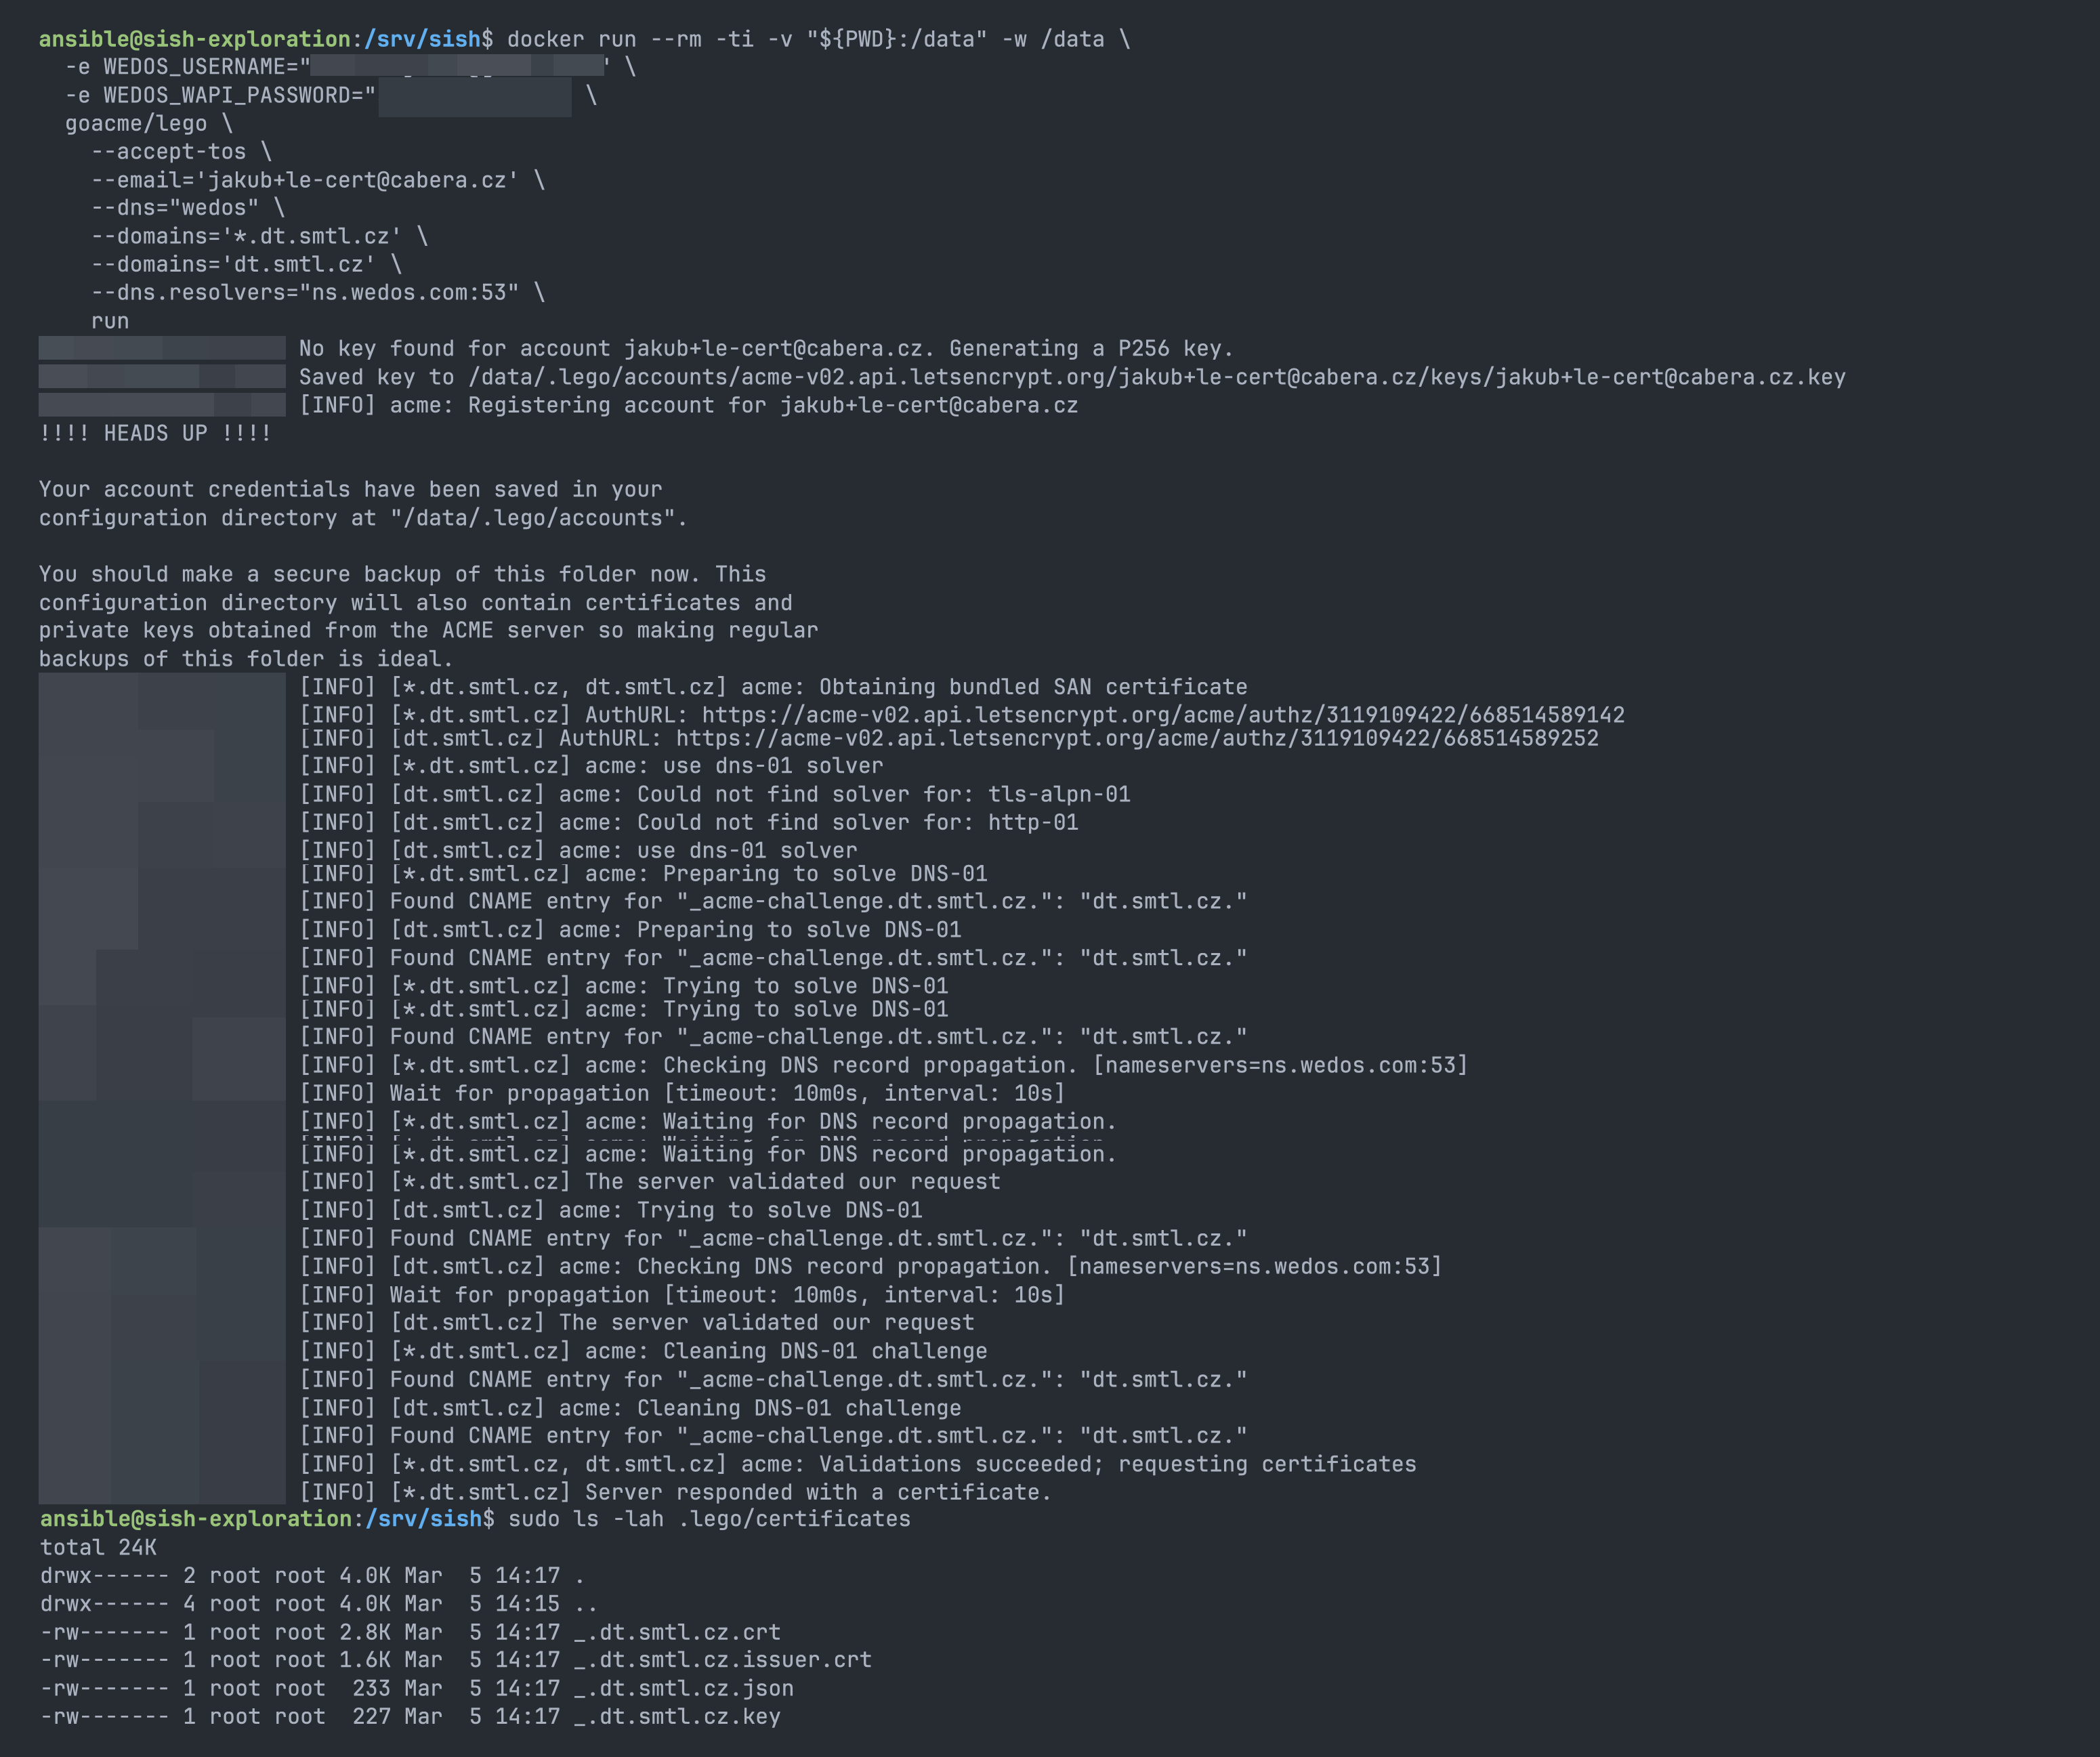
To create a simple certificate, you can use lego client in a Docker container. Make sure to replace the environment variables with your own values.
All lego providers can be found on their official website: https://go-acme.github.io/lego/dns/index.html
| |
It should look like this:
Step 4: Create required configurations
As soon as the certificate is ready, we can move to the next step and create the required configuration files for sish.
Connect to the VM and create the following directory structure:
You do not need to follow the directory structure I use, but make sure to update the paths in the configuration files accordingly.
mkdir -p /srv/sish/{certs,keys,pubkeys,ssh-keys}
| |
| |
| |
Copy the certificate and private key to the certs directory.
| |
Add the public keys of all users who will have access to create tunnels to the pubkeys directory. Each key should be in a separate file with a .pub extension.
Step 5: Run the stack and verify
While inside the /srv/sish directory, run docker compose up -d to start the sish server. Check the logs with docker logs -f sish to verify that the server is running without errors.
 docker compose logs -f
Just to make sure everything is working, you can run:
| |
The same test can be done from your local machine to verify that the ports are open and accessible from your location:
| |
Step 6: Test the forwarding
To test the forwarding, we will create a simple tunnel for whoami service running locally. This service will return the request details, so we can verify that traffic is properly forwarded through the tunnel.
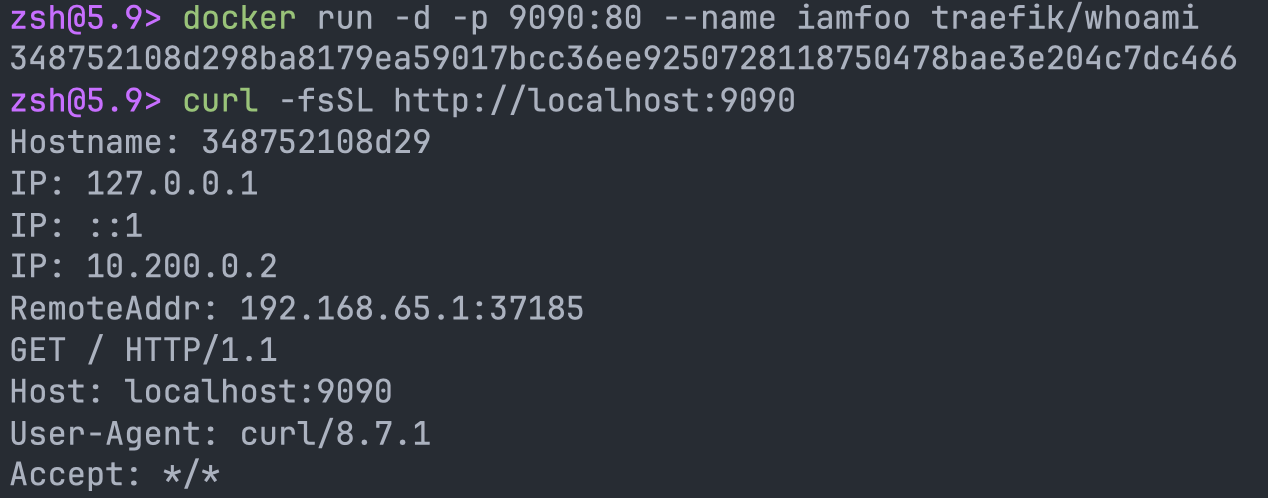
- Start whoami container:
docker run -d -p 9090:80 --name iamfoo traefik/whoami
- User browser or curl to visit
http://localhost:9090and verify that you see the whoami page. - Open the
sishtunnel:ssh -R whoami-test-jc:80:localhost:9090 -p 2222 dt.smtl.cz- You should get a similar output:

- Visit the URL
https://whoami-test-jc.dt.smtl.czin your browser- You should see the same whoami page, but this time the traffic is forwarded through the
sishtunnel and secured with a certificate. 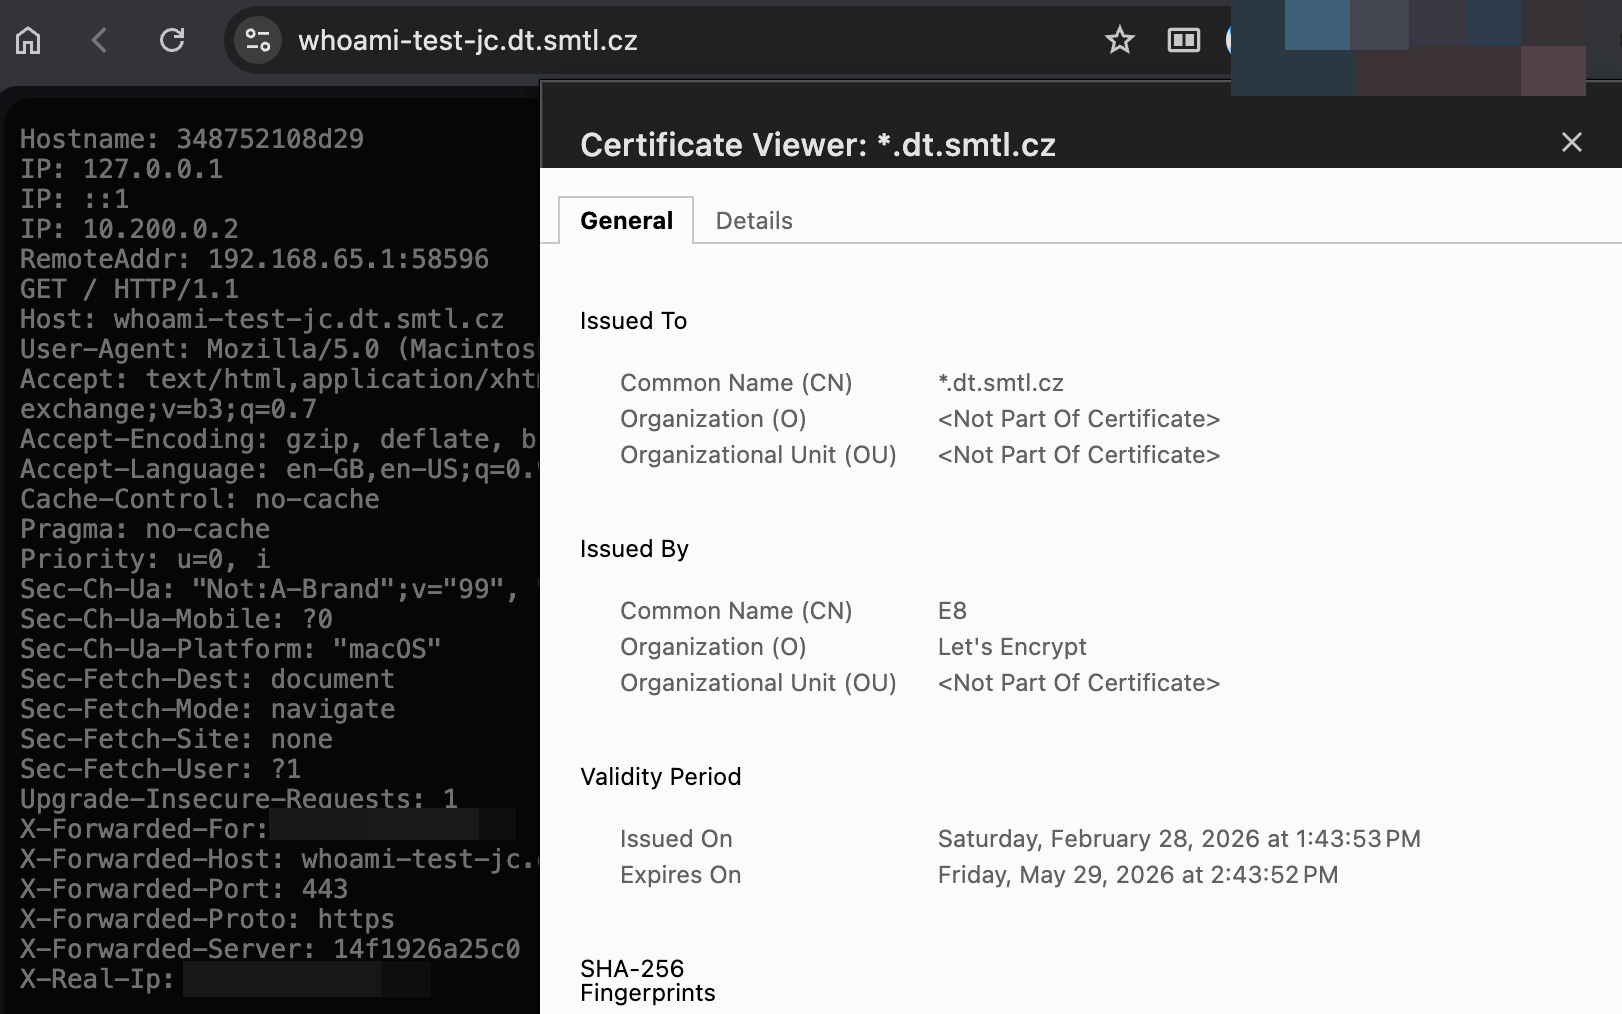
- You should see the same whoami page, but this time the traffic is forwarded through the
If you face some issues, check the sish logs with docker logs -f sish to see if there are any errors or warnings.
Wrap up
You successfully configured a self-hosted alternative to ngrok using sish. You can now create tunnels to your local services and access them securely over the internet. Remember to monitor the server and keep it up to date to ensure security and stability.
Consult the official configuration example file for all available configuration options, and adjust it to your needs.
✨ Bonus: Authentication using OS users (smallstep compatible)
Securing sish could be achieved by various methods like manually generated SSH keys, Smallstep SSH certificates, or VPN.
If you have an existing authentication system used for connecting to Ubuntu VMs, you can leverage it for sish authentication. This way, you don’t need to manage separate keys for sish in the local directory (/pubkeys).
To leverage OS level auth, do the following:
- Use configuration
authentication: falsein thesishconfiguration file - Edit docker
compose.ymlto expose the SSH port ofsishservice only on localhost:
1 2ports: - "127.0.0.1:2222:2222"
This will expose the internal SSH port of sish only on localhost, so it is not accessible externally.
To use sish in this setup, you need to use the Docker host system as a ProxyJump for the SSH connection.
Previous example command for creating the tunnel, that is adjusted for this setup, would look like this:
| |
When you use this command, the SSH client first connects to the Docker host system (dt.smtl.cz), using the OS user ansible, then connects to the sish service running on localhost via port 2222. This way, you can leverage your existing authentication system based on OS users without the need to manage separate keys for sish.
 SSH connection with jump host
To make it easier to use, you can create an SSH config file with the following content:
| |
The final command for creating the tunnel would look like this:
ssh -R whoami-test-jc:80:localhost:9090 dt
 Connection with SSH config entry
✨ Bonus 2: Setup automatic certificate renewal
Having a manually generated certificate is ideal only for testing purposes. For production use, you should set up automatic certificate renewal to ensure your certificate remains valid and you don’t have to worry about it expiring.
The goal is to have a cron job that runs the certificate renewal command periodically and updates the certificate files in the certs directory.
Since we need to restart the sish container after the certificate is renewed, we need to have lego accessible on the Docker host and create a simple script that handles the renewal and restarts the container.
First, install lego on the Docker host systems.
For the demo, I prefer getting the binary from the Docker image, but you should follow your internal best practices for installing (and keeping up to date) software on your servers.
docker run --rm -ti -v "${PWD}:/data" -w /data --entrypoint sh goacme/lego -c 'cp /lego /data/lego'
This command copied the lego binary to the current directory, so you can move it to a more suitable location.
mv ./lego /usr/local/bin/lego
Create a script that will handle the certificate renewal:
| |
Create the hook script that will copy the renewed certificate to the sish certs directory and restart the container:
| |
Make both scripts executable: chmod +x /srv/sish/hooks/*.sh
Finally, create a cron job that will run the renewal script periodically.
Always pick a random hour and minute to run the renewal to avoid overloading of the ACME servers. See https://go-acme.github.io/lego/usage/cli/renew-a-certificate/index.html#automatic-renewal for more information.
29 2 * * * /srv/sish/hooks/renew-cert.sh >> /srv/sish/renew.log 2>&1